

Hex bolt Bearing-Face Flatness and Under-Head Stress
In failure reviews for precision machinery joints, I often see a hex head that seats first on one edge and bends the shank as tightening progresses. The final damage may look like a simple broken fastener, but the engineering sequence begins earlier—with material identity, joint geometry, manufacturing integrity, installation behavior, or a changing service environment. This article develops bolt bearing-face flatness from that mechanism rather than from marketing claims.
The verified product data are deliberately narrow: stainless steel 904L Hex bolt, M3–M160, non-standard capability, and execution to DIN, ANSI, GB, or an approved non-standard drawing. No strength class, proof load, tensile value, hardness, torque coefficient, fatigue limit, corrosion-life value, coating, tolerance set, or exact standard number is supplied. Verify every missing parameter against the manufacturer's current test report before specification.
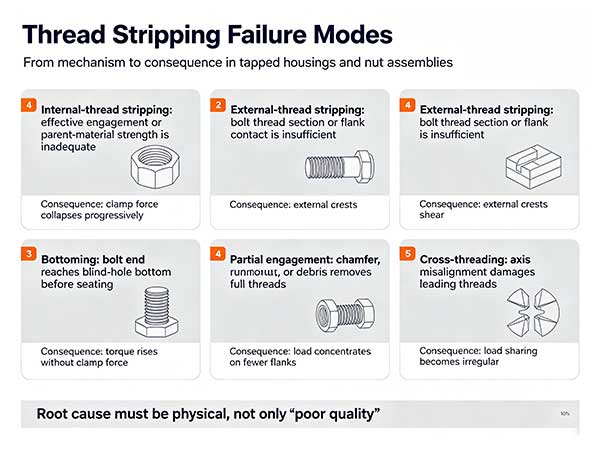
Shear in a properly clamped joint may be transferred initially by friction between the members. Once slip begins, load shifts toward hole bearing, shank contact, thread contact in the shear plane, and local bending. The change is nonlinear and often leaves polished interfaces, fretting debris, elongated contact marks, or asymmetric bearing impressions. Those witness marks are essential evidence during failure analysis.
A design that intentionally permits bearing-type shear requires different checks from a slip-resistant joint. Hole tolerance, shank position, thread location, edge distance, member thickness, and deformation compatibility become central. The bolt description alone cannot resolve which load path the assembly is intended to use.
In the present case, the governing service action is preload combined with angular bearing and local under-head bending. I would map that action from the clamped members through the bearing face, head-to-shank transition, shank, engaged threads, and mating component. The map should identify where contact can open, where slip can begin, and where local bending or stress concentration appears. That exercise determines which dimensions and defects are truly critical.
Define the unloaded geometry. Record gaps, contact faces, thread position, effective engagement, and alignment.
Define installation. State how clamp force is created, measured, and retained without assuming torque equals preload.
Apply service actions. Include preload combined with angular bearing and local under-head bending and any redistribution among neighboring fasteners.
Evaluate degradation. Consider machined or cast seats, washers, burrs, coating thickness, and tool access as changes to mechanics, material condition, and inspectability.
Link evidence to decisions. Assign a drawing control or test to every credible failure mechanism.
Quality Management System certificate LY203E5074Q, issued by Shanghai Liyang Certification Co., Ltd. is the only supplied certification evidence. It indicates certification of a quality management system; current validity, site, scope, and the management-system standard referenced by the certificate must be verified before the document is used in a technical file.
The relevant “components” include geometric zones and mating interfaces because a bolt cannot be validated in isolation. For precision machinery joints, the critical set is determined by the route through which preload combined with angular bearing and local under-head bending enters the assembly. The table separates verified information from project definitions so an engineer can see where evidence is still missing.
| Element | Verified or Required Definition | Engineering Function | Risk if Compromised |
|---|---|---|---|
| bolt bearing-face flatness material path | stainless steel 904L | Preserves the material assumption used for precision machinery joints | A material mix breaks the connection between validation and production |
| Selected geometry within M3–M160 | Exact controlled drawing required | Locates the head, shank, thread, and mating interfaces in the intended load path | Under-head bending and embedment increase |
| Edge seating control feature | Drawing-defined geometry and surface condition | Prevents or exposes the condition: Bearing face or member seat is angular | Under-head bending and embedment increase |
| Fillet interference control feature | Project-defined mating interface or process state | Prevents or exposes the condition: Hole or washer chamfer is too small | Clamp load enters through an unintended contact |
| Local crushing control feature | Drawing-defined geometry and surface condition | Prevents or exposes the condition: Bearing area or member stiffness is inadequate | Preload relaxes after installation |
| Under-head lap failure control feature | Project-defined mating interface or process state | Prevents or exposes the condition: Forming discontinuity lies in a bending hotspot | Fatigue initiates at the lap |
Verify all parameters against current test reports and applicable standards before use in specifications.
A nominal material and diameter do not resolve transition geometry, thread tolerance, bearing-face relationship, or mating-thread behavior. Those features should be controlled on one drawing hierarchy with clear precedence. When a standard family is invoked, any non-standard departure must be visible rather than hidden in a general note.
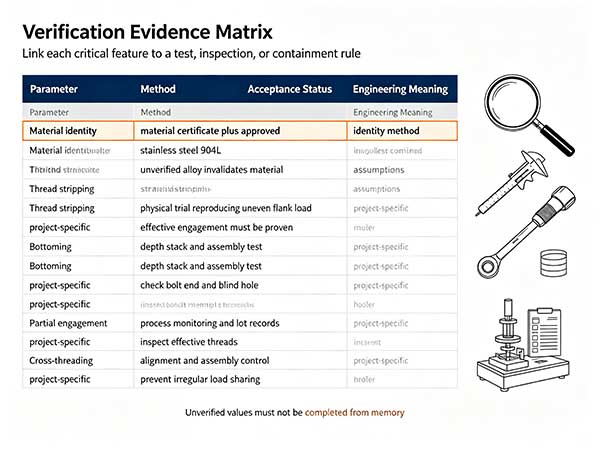
I use an evidence matrix rather than a generic inspection list. Each row must state the characteristic, why it matters to bolt bearing-face flatness, the production stage that creates it, the verification method, acceptance rule, sampling or screening frequency, reaction plan, and retained record. Values absent from the appendix remain open; they must not be completed from memory or from another fastener grade.
| Parameter | Verification Method | Acceptable Range or Status | Engineering Meaning |
|---|---|---|---|
| Finished material identity | Current material certificate plus an approved identity method | stainless steel 904L | Unverified alloy invalidates material assumptions |
| Selected nominal size | Calibrated dimensional inspection | M3–M160 is the supplied range; select and verify one size | Fit and load calculations cannot use an undefined size |
| Execution standard | Document review and feature-specific inspection | DIN, ANSI, GB, or an approved non-standard drawing | Exact identifier and revision are not supplied |
| Edge seating verification | A physical trial reproducing preload combined with angular bearing and local under-head bending | Project-specific; Control perpendicularity and seat flatness | Bearing face or member seat is angular would lead to Under-head bending and embedment increase |
| Fillet interference verification | Feature-level dimensional or surface inspection | Project-specific; Check geometric compatibility | Hole or washer chamfer is too small would lead to Clamp load enters through an unintended contact |
| Local crushing verification | Exposure or assembly test reflecting machined or cast seats, washers, burrs, coating thickness, and tool access | Project-specific; Verify bearing pressure and material | Bearing area or member stiffness is inadequate would lead to Preload relaxes after installation |
| Under-head lap failure verification | Process-monitoring and lot-containment record | Project-specific; Validate forming and surface integrity | Forming discontinuity lies in a bending hotspot would lead to Fatigue initiates at the lap |
| Quality-system evidence | Check current site, scope, validity, and issuer | Quality Management System certificate LY203E5074Q, issued by Shanghai Liyang Certification Co., Ltd. | Records must support bolt bearing-face flatness, not only a general system claim |
Verify all parameters against current test reports and applicable standards before use in specifications.
DIN, ANSI, and GB are standard families, not complete product definitions. The engineer must identify the exact document, revision, product style, thread system, tolerance class, mechanical-property requirement, and test method actually intended. An approved non-standard drawing must carry those requirements itself. “Equivalent” should not be accepted without a documented comparison of every functionally relevant clause.
For bolt bearing-face flatness, acceptance ranges should be derived from the validated load path and assembly. If the project requires preload, fatigue, corrosion, stripPing, hardness, case depth, optical resolution, eddy-current limits, or capability targets, those numbers require current evidence. The supplied material and dimensional range cannot substitute for them.
The bearing face introduces clamp force into the member. If it is not perpendicular to the bolt axis or the seat is uneven, contact begins on a small area. Local pressure rises, surface asperities collapse, and the head rotates relative to the shank. That rotation creates an under-head bending stress superimposed on tensile preload.
The fillet and washer or hole chamfer must be geometrically compatible. Interference can create false seating at the transition rather than on the intended bearing face. A torque tool may reach its target while the joint remains poorly seated. Dimensional inspection should reproduce the functional datum relationship between bearing face, shank, and thread.
Cold-forming flow near the head is relevant because laps or eccentric fill can coincide with the highest bending location. Section validation and crack detection should be selected according to consequence; exact tolerances are not supplied and must come from the controlled drawing.
Edge seating as a design condition. In precision machinery joints, the initiating mechanism is Bearing face or member seat is angular. I would reproduce preload combined with angular bearing and local under-head bending while holding the mating geometry and installation state constant, then examine the feature before and after loading. The engineering consequence is Under-head bending and embedment increase. A useful validation record must show why the proposed control—Control perpendicularity and seat flatness—interrupts that physical chain rather than merely detecting the final damage.
Evidence needed for Fillet interference. The investigation should search specifically for evidence of Hole or washer chamfer is too small. Relevant observations may include asymmetric contact, dimensional movement, surface transfer, a localized fracture origin, or a process record that changed before the affected lot. Because Clamp load enters through an unintended contact, acceptance should be based on a project-defined functional test and a feature-level inspection. The preventive requirement is to Check geometric compatibility.
Boundary case: Local crushing. This mode becomes important when normal production or service variation moves the assembly toward Bearing area or member stiffness is inadequate. The review should test the least favorable credible combination of geometry, material state, friction, and machined or cast seats, washers, burrs, coating thickness, and tool access. If the mechanism is active, Preload relaxes after installation. The specification should therefore require evidence to Verify bearing pressure and material and should define containment when that evidence fails.
Inspection logic for Under-head lap failure. Final visual appearance alone cannot confirm whether Forming discontinuity lies in a bending hotspot. I would select an inspection method that observes the initiating feature, a process signal that identifies when it can be created, and a lot record that limits exposure. The reason is direct: Fatigue initiates at the lap. The control plan should state how to Validate forming and surface integrity, who reacts, and which product remains on hold.
Field interpretation of Tool-induced tilt. When the assembly is returned from service, the analyst should compare the damaged part with unused parts from the same lot and with neighboring fasteners. The working hypothesis is Socket access forces the tool off-axis; the expected consequence is Head and shank receive installation bending. Installation records, contact marks, fracture location, material evidence, and process genealogy should either support or reject that hypothesis. Corrective action must Provide aligned access.
Selective induction hardening uses localized electromagnetic heating followed by quenching and tempering. A complete process definition includes coil geometry, coupling distance, frequency, delivered power, heating time or traverse speed, quench timing, quench distribution, temper condition, and part orientation. These variables control the surface-to-core thermal path and therefore the hardness gradient, case shape, distortion, and transition microstructure.
A single surface-hardness reading does not validate the process. A sectioned hardness traverse, declared case-depth criterion, metallography, crack inspection, dimensional comparison, and core-property evidence are needed. Material suitability must be confirmed before induction hardening is specified; no such process or hardness values are supplied for the verified 904L hex bolt.
In-process load monitoring can identify a short cutoff, missing transfer, tool chip, lubrication change, or gradual die wear when the signal is correlated with physical product evidence. A force or force–displacement envelope should be developed from controlled trials and reviewed by station. One broad alarm band may conceal a local event that matters at only one stage.
When an alarm occurs, the reaction plan must stop or segregate product back to the last verified point, identify the tool and material lots involved, and require a documented release decision. Monitoring reduces exposure only when containment is faster than production can mix suspect parts with accepted output.
Stage 1 — Edge seating: prepare an assembly or production sample in which Bearing face or member seat is angular. Apply or simulate preload combined with angular bearing and local under-head bending, then document whether Under-head bending and embedment increase. Release the stage only when the evidence shows that the design or process will Control perpendicularity and seat flatness.
Stage 2 — Fillet interference: prepare an assembly or production sample in which Hole or washer chamfer is too small. Apply or simulate preload combined with angular bearing and local under-head bending, then document whether Clamp load enters through an unintended contact. Release the stage only when the evidence shows that the design or process will Check geometric compatibility.
Stage 3 — Local crushing: prepare an assembly or production sample in which Bearing area or member stiffness is inadequate. Apply or simulate preload combined with angular bearing and local under-head bending, then document whether Preload relaxes after installation. Release the stage only when the evidence shows that the design or process will Verify bearing pressure and material.
Stage 4 — Under-head lap failure: prepare an assembly or production sample in which Forming discontinuity lies in a bending hotspot. Apply or simulate preload combined with angular bearing and local under-head bending, then document whether Fatigue initiates at the lap. Release the stage only when the evidence shows that the design or process will Validate forming and surface integrity.
Stage 5 — Tool-induced tilt: prepare an assembly or production sample in which Socket access forces the tool off-axis. Apply or simulate preload combined with angular bearing and local under-head bending, then document whether Head and shank receive installation bending. Release the stage only when the evidence shows that the design or process will Provide aligned access.
This sequence should use the selected size, actual mating components, production surface state, and the environmental condition described as machined or cast seats, washers, burrs, coating thickness, and tool access. It is not a substitute for required project standards; it is the mechanism map used to choose the correct verified methods. Acceptance values remain project-specific wherever the supplied appendix is silent.
The manufacturing and inspection layers must be connected. A forming simulation predicts risk but does not release product; sectioning proves selected samples but does not screen an entire lot; process monitoring detects signal changes but requires defect correlation; optical and eddy-current sorting each have limited detection mechanisms. The control plan should combine them only where each layer has a defined question and a validated boundary.
These distinctions also prevent invalid transfer of technology claims. Thread rolling after heat treatment, induction hardening, multi-station cold forming, SPC, optical sorting, and eddy-current screening can all be useful, but none automatically applies to every 904L hex bolt. The selected process must be compatible with the material, geometry, required performance, and inspection evidence for the actual project.
| Failure Mode | Mechanism-Specific Root Cause | Consequence | Prevention or Evidence |
|---|---|---|---|
| Edge seating | Bearing face or member seat is angular | Under-head bending and embedment increase | Control perpendicularity and seat flatness |
| Fillet interference | Hole or washer chamfer is too small | Clamp load enters through an unintended contact | Check geometric compatibility |
| Local crushing | Bearing area or member stiffness is inadequate | Preload relaxes after installation | Verify bearing pressure and material |
| Under-head lap failure | Forming discontinuity lies in a bending hotspot | Fatigue initiates at the lap | Validate forming and surface integrity |
| Tool-induced tilt | Socket access forces the tool off-axis | Head and shank receive installation bending | Provide aligned access |
Verify all parameters against current test reports and applicable standards before use in specifications.
When a hex head that seats first on one edge and bends the shank as tightening progresses, I would preserve the assembly before cleaning or disassembly. Bearing marks, thread position, fretting, corrosion deposits, fracture orientation, tool records, and neighboring fastener condition can distinguish the initiating mechanism from the final overload. A replacement with a larger or nominally stronger bolt may shift the damage elsewhere if the true cause is misalignment, prying, settlement, galling, or an unverified mating thread.
Root cause should be written as a physical chain. “Poor quality” is not enough; “a folded surface created during preforming remained at the under-head transition and initiated a cyclic crack after joint separation introduced bending” is testable. The evidence plan can then confirm or reject each link in the chain.
Model preload combined with angular bearing and local under-head bending through the real stack used in precision machinery joints.
Select one geometry within M3–M160 and define every functional datum, transition, thread, and contact face.
Require current finished-lot evidence for stainless steel 904L; do not accept a generic stainless description.
Set project values for strength, proof behavior, hardness, fatigue, stripping, and deformation because the appendix supplies none.
Edge seating: verify whether Bearing face or member seat is angular; require the production or design control to Control perpendicularity and seat flatness.
Fillet interference: verify whether Hole or washer chamfer is too small; require the production or design control to Check geometric compatibility.
Local crushing: verify whether Bearing area or member stiffness is inadequate; require the production or design control to Verify bearing pressure and material.
Under-head lap failure: verify whether Forming discontinuity lies in a bending hotspot; require the production or design control to Validate forming and surface integrity.
Tool-induced tilt: verify whether Socket access forces the tool off-axis; require the production or design control to Provide aligned access.
Reproduce the actual mating thread, bearing surface, lubricant state, speed, and joint stack during installation validation.
Test the effect of machined or cast seats, washers, burrs, coating thickness, and tool access instead of assigning durability from the alloy name.
Define an as-installed baseline, inspection access, interval logic, reuse decision, and response to a failed member of the joint.
Name the exact DIN, ANSI, or GB document and revision, or release a complete non-standard drawing.
Check Quality Management System certificate LY203E5074Q, issued by Shanghai Liyang Certification Co., Ltd. for the current site, scope, status, and referenced management-system standard.
Keep all unverified numeric properties out of the specification until a current report is approved.
Share your project parameters for a technical review.
Ningbo yi teng construction machinery CO,LTD states that it controls raw materials and product quality and offers stainless steel 904L hex bolt in M3–M160 and non-standard forms; the supplied certification is Quality Management System certificate LY203E5074Q, issued by Shanghai Liyang Certification Co., Ltd. The current product page should be checked for the selected drawing, test reports, and exact execution-standard reference before specification.
Manufacturer capability should be assessed with representative records. I would review a controlled process flow, first-article report, material evidence, gauge studies for critical characteristics, control charts with actual reaction examples, sorting validation, and a closed corrective-action case. These records show whether the system responds to variation rather than merely documenting it.
For non-standard geometry, tooling design and feasibility review are especially important. The manufacturer should explain how stock volume, material flow, transitions, secondary operations, and inspection access were evaluated before the drawing was released.
For bolt bearing-face flatness, the audit should follow one real lot. Select a finished container and trace backward through release, inspection, process settings, tool identity, material receipt, and drawing approval. Then select one recorded process alarm or nonconformance and trace forward through containment, correction, verification, and disposition. That two-direction review tests whether the system works under normal and abnormal conditions.
Start with the physical possibility of Bearing face or member seat is angular. In precision machinery joints, a valid answer requires a trial or calculation that reproduces preload combined with angular bearing and local under-head bending, followed by inspection of the feature linked to Edge seating. The supplied product facts contain no numeric limit for this decision.
Use the exact controlled drawing and name the applicable DIN, ANSI, GB, or approved non-standard requirement. The concern is that Hole or washer chamfer is too small, which means an isolated catalogue value or generic gauge result cannot settle the question. Evidence should demonstrate how to Check geometric compatibility.
Look for the initiating evidence before interpreting the final symptom. If Bearing area or member stiffness is inadequate, the expected engineering consequence is Preload relaxes after installation. Material, process, installation, and lot records should be compared with physical witness marks before corrective action is selected.
Treat the condition as a defined edge case. The stated M3–M160 range and 904L material do not establish performance when Forming discontinuity lies in a bending hotspot. The drawing and validation plan must show how the design will Validate forming and surface integrity under machined or cast seats, washers, burrs, coating thickness, and tool access.
Submit the controlled drawing, joint stack, mating-thread details, service loads, environment, and installation method for an engineering specification review.
Contact person: Mr.Ren
Phone:0086-13958324455
Customer service: +86-0574 88065928
Email: Sales@zjbzj.com
Fax: +0086-0574 88065656

official website
Copyright @ Ningbo yi teng construction machinery CO,LTDmainly engaged in Blade Bolts Series, Hexagon bolt, and Bucket teeth. Welcome to inquire!
SitemapThis website uses cookies to ensure you get the best experience on our website.
 Español
 Portugues
 Pусский
 Français
 Deutsch
 日本語
日本語 한국어
한국어 العربية
 हिन्दी


 WhatsApp
 Phone
Phone
Comment
(0)